Giveaway: MyMemories Software

I don’t know about you, but I always love reading blogs with fancy layouts in their posts.  I always wondered how to do it… and guess what… I found a simple solution! 
I was offered a chance to try out the My Memories digital scrapbooking software, and I’ve been having so much fun with it!  There are a ton of pre-made templates with decorative backgrounds, etc. that make it quick and easy to put together a page that looks very well planned and thought out… see yesterday’s post for an example.
Or… you can start from scratch and do whatever you want.  Here are a couple of ideas.  You could…
giveaway-001
… or …
giveaway-002
The My Memories suite makes it super easy to do these kinds of layouts.  From there, you can easily make your pages into photo cards or photo books!  How fun is that?
*** Note:  A couple of people have asked if the software is Mac compatible, and yes, it is! ***
Bloggers, you need to try this software out.  MyMemories has offered one MyMemories Suite for me to give away to one of you!  To enter the giveaway you must be a follower of the Fabulous Design File.  Then get one entry for doing each of these things:
  • Go to MyMemories.com to see the choices of layouts and digital paper packs… then come back here and leave a comment.
  • Follow MyMemories on their blog, facebook, or twitter and leave a comment here for each one.
Blog- http://blog.mymemories.com/
Facebook- http://www.facebook.com/mymemoriessuite
Twitter- http://twitter.com/#!/mymemoriessuite
  • Tweet about the giveaway (please include @carissa_E and @MyMemoriesSuite in the tweet) and leave a comment here saying you did so
Good Luck!  I’ll make the draw next Tuesday, Sept. 6th!

BONUS… if you can’t wait to try the software out, use this code for a $10 discount + a $10 coupon for the MyMemories store.

STMMMS74031

Where did the week go???

Seriously… it’s Monday already???
Even more seriously… it’s THE LAST WEEK OF SUMMER already???
goodbye summer-001
This summer has been one of the best.  We’ve had almost perfect weather, weeks at the lake, fun in our yard, tons of bike rides, and playtime with the cousins almost every day.
As much I’m looking forward to fall, I’m going to do my best to enjoy every day this week.  Summer just goes too fast! 
ps… did you notice the fun photo layout?  I made it with my new My Memories software.  Come back tomorrow for a fun giveaway!

DIY: Painted Floor Mat

*** UPDATE!!!  Don't try this project!  The paint cracked like crazy (after several months.)  See this post for the update. ***


I needed some kind of an area rug for my family room just for the spring and summer months.  In the winter I have a big thick fluffy rug, but it just doesn’t work in the summer.  It’s too warm, plus the kids drag in all kinds of extra dirt at this time of the year, so I need something easy to clean. 
When I saw this project on Sarah.Wandering, I knew it was something I wanted to try.  I love the practicality of interlocking floor mats.  They are comfortable for the kids to sit or play on, inexpensive, easy to clean, and easy to store away when you aren’t using them.
However, it was the kind of project that walks a fine line between awesome and tacky.  I mean, to put it bluntly, these mats on their own are kind of fug.  So I was nervous.  But I have to say, I love how it turned out!  The graphic pattern is exactly what I wanted, and I was able to use leftover paint that I already had.  (Hahaha… I had the choice of 3 shades of charcoal grey, and about 6 shades of white!) 
Anyways, here are the steps to follow if you want to customize your own floor mat:
1.  I used the typical primary coloured 2’x2’ interlocking floor mats.  They come in 4-packs.  I decided to make my rug 3 tiles wide by 5 tiles long.  I had to air mine out for about a week in my garage, because they have a strong smell when they are new.   

2.  Prime the spongy back side of the mat (not the textured side).  It took 1 coat of latex primer.  Make sure you separate the tiles after this step so they don’t get stuck together as the primer dries.
3.  Apply 2 coats of the base color.  I used a latex exterior paint because that’s what I had on hand.  Exterior paint has a little bit of flex to it, which makes it ideal for bendy situations such as a floor mats and rugs to prevent cracking.  Again, separate the tiles before the paint dries or they will stick together.
4.  Assemble the tiles and paint on whatever design you want.  I used the exterior latex paint again (because that’s what I had) but Sarah used regular acrylic craft paints for her rug.  I made a stencil of the diamond pattern that I was after, chalked out a vertical center line plus evenly spaced horizontal lines to keep everything from going wonky, then stencilled away! 

*** I have to give props to anyone who has the patience and skill to stencil an entire wall or especially a ceiling!  I’m sure I’m far to messy and spastic to be successful at either of those tasks.  Even with this project, I did a ton of touching up to cover up blurbs of paint that leaked out of the stencil and got dragged around all over the mat.  ***
5.  Finish with two coats of water based Varathane in satin finish to protect your design and make the mat washable.  Again, separate tiles before drying. 

6.  Voila!  Enjoy your much more stylish, yet fabulously functional floor mat!

* Linking up to:
The Shabby Nest

Another Mom of the Year Moment

This is how finger-painting turns out at my house. 

(I may or may not have snuck into the adjacent dining room to work on a painting project while this was taking place.)
I thought that all of the hysterical laughing was related to the fart noises the finger-paint bottles were making, but realized that I needed to intervene when I figured out that they were shrieking things like “look at my face!” … “look at my back!” … “look at my tummy!” etc.  I sprinted into the room, but not before “look at the chair!” and “look at the bench!” and “look at the table!”  UGH.

My Zipline Adventure

The highlight of my vacation last week was my ZIPLINE canopy tour at Cypress Hills Eco-Adventures.  It was crazy / fun / scary / exhilarating all at once! 

*** skip to the end if you just want the video highlights… if you want full dets, read on… *** 

Here I am, suited up and nervously waiting to get started…

- Sidenote - I’ve become very UN-adventurous over the last few years.  In fact, I think after having kids something must have changed in my brain chemistry to make me develop all kinds of dorky fears.  For example, I don’t like being in really crowded places, I’ve had a few weird elevator-related moments, I’m nervous about flying, and can’t handle HEIGHTS anymore.  So, why the heck would I choose to step off of a 40 foot platform to go hurtling through the air on a zipline???

It’s all because of this guy:

Jori… my cousin… like a little brother to me.  He’s the President, CEO and founder of Cypress Hills Eco-Adventures.  It’s a world-class zipline tour, and there really is nothing else like it in Saskatchewan (maybe even Canada???)  He just started up the business this year and it’s unique and exciting and impressive.  I’m so freakin’ proud of this guy!

Also… have to give a BIG shout to Rhett:

He’s also my cousin (and like another little brother) and works as a tour guide at the zipline.  Without him making fun of encouraging me, I probably wouldn’t have even let go of that first pole, let alone step off the platform.

Anyways… back to the adventure…

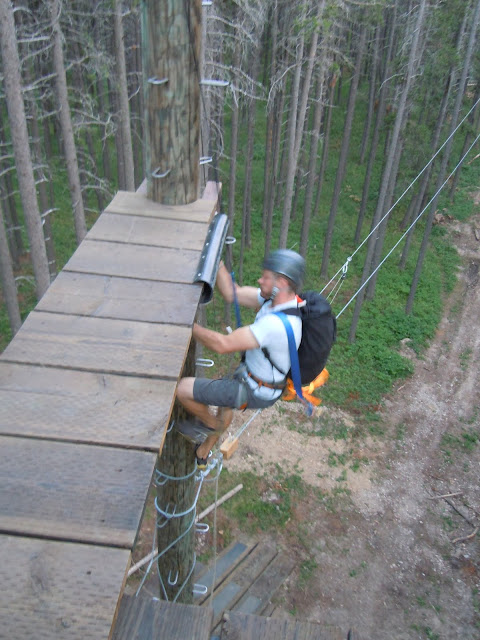
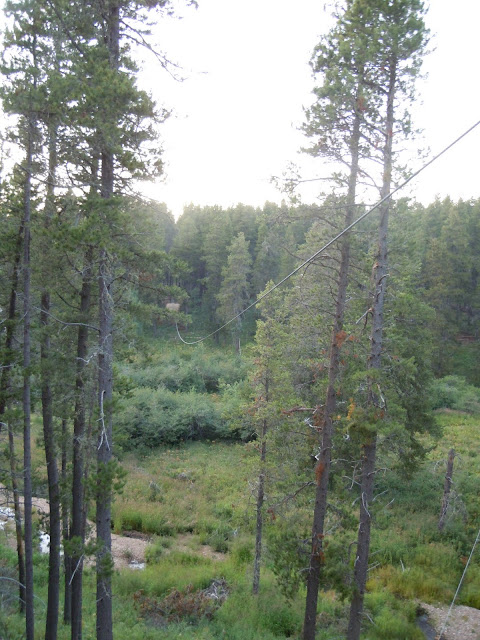
The first thing you have to do is climb up a 40 foot rope ladder to a small platform attached to a pole.  Also worth mentioning is that fact that the pole kind of sways like a tree.  Here’s the view looking down… notice how tiny Jeff and the two boys look!  EEEEK!

Thank goodness Jori and Rhett are pros at this… they made the tour super fun, even though I was terrified a wee bit nervous.  (Notice me clinging to the pole for dear life.) 

For the record… the zipping part (where you are flying through the air) is super FUN and not really scary at all… except for the part where I somehow spun around and came barrelling into the platform backwards. I’m pretty sure I almost hip-checked Jori right off of the platform.  (I blame that incident on the Bud Light Lime weight I’ve gained this summer.)

Anyways… two of the more crazy parts of the tour were:

1.  Teetering my way across the sky-bridge.  Just EEEK.

2. Climbing from one tiny platform (already 40 feet in the air) straight up this pole, and somehow hauling my ass over and onto an even higher platform.  Jori makes this look easy.  IT WASN’T!!!

So after 4 zips from platform to platform, you end up at a super long line that goes over a little valley.  The best part about it was that you land on the ground at the other side!  I totally felt like a pro at that point.  Hahaha.  My confidence level skyrocketed once my feet were back on solid ground.

Jori told me that the tour would be empowering, and I was all “yeah, yeah, whatever…” but IT TOTALLY WAS!  You have to try it to know what I mean.  I HIGHLY recommend it.  If you live anywhere near Cypress Park, it is worth the trip to experience this adventure.  See the Cypress Hills Eco-Adventures website for details. 

And finally… check out my video footage.  It was so super fun.  Big time thanks to Jori and Rhett for the awesome tour!

Carissa's Cypress Hills Eco-Adventures Zipline Tour from Carissa Erickson on Vimeo.

100 Things: Cypress Park Edition

This is a list of 100 Things that make me happy... more details here

We just got back from a week at our family cabin at Cypress Hills Provincial Park.  This year’s vacation was extra special because it was our last week at the cabin (it sold while we were there!)  I’ve been lucky enough to spend time at the cabin every summer since I was a kid… tons of memories!  Here are some of the things that made me happy this week:

51.  The Lake

52.  The Cabin

53.  Cabin Decor (So tacky, yet so perfect.)

54.  More Cabin Decor

55.  Last one… I promise

56.  Hiking

57.  The Golf Course

58.  Slack Line Fun

59.  My ZIP LINE Adventure!!!  (Full dets on that tomorrow… do I look terrified???)

60.  Couldn’t resist… one more of the Cabin Decor

Lounging

Admittedly, I’m not very ‘outdoorsy.’  I’m more likely to spend a summer weekend tackling a big painting project indoors than I am to lounge around in the backyard.  But these outdoor daybeds have me rethinking all of that:

Or… we could take it up a notch, and make it a hanging day bed!!!  How fun is that???

all images via Pinterest

Inspiration File: Outdoor Room

I love pretty much every single thing about this room.  The black and white curtain panels, the red zigzag pillows, the white furniture.  Maybe next year I’ll do something like this in our backyard...

image via Pinterst

My New Art… SO Fabulous!

I’ve been wanting to purchase a painting for a while.  And I’ve had my eye on a few, but nothing was really convincing me.  Know what I mean?  I’d see a lot of things that I liked, but nothing that I LOVED. 

Then I found this…

boerne_ii_style

As soon as I saw it, I knew I HAD to have it!  So I went to purchase it, and the website said that it couldn’t be shipped to Canada!  BLURG!!!  Luckily, Annie from The Now, hooked me up with the artist, Samantha Sano, who was super sweet and said that of course she could ship to Canada!  Yay! 

So, the painting is called Boerne II, and it arrived at my house yesterday!!!  I’m beyond thrilled with it!  It’s part of The Summer Project, a collection of gorgeous watercolours by Samantha.  You can read more about The Summer Project here.  You better hurry, though, because The Summer Project paintings are selling fast.  

Also worth noting… (although it’s probably obvious to most of you) the photograph is from Samantha’s fabulous blog, Style/SWOON.  I tried to get a photo of the painting in my own home, but can’t seem to find an angle without massive amounts of glare this morning.  And Samantha did such a gorgeous job of styling, that I thought I should share her photo instead!